NexMate

Photo to Lego: Turn an Authorized Photo into a Brick-Toy Style Concept

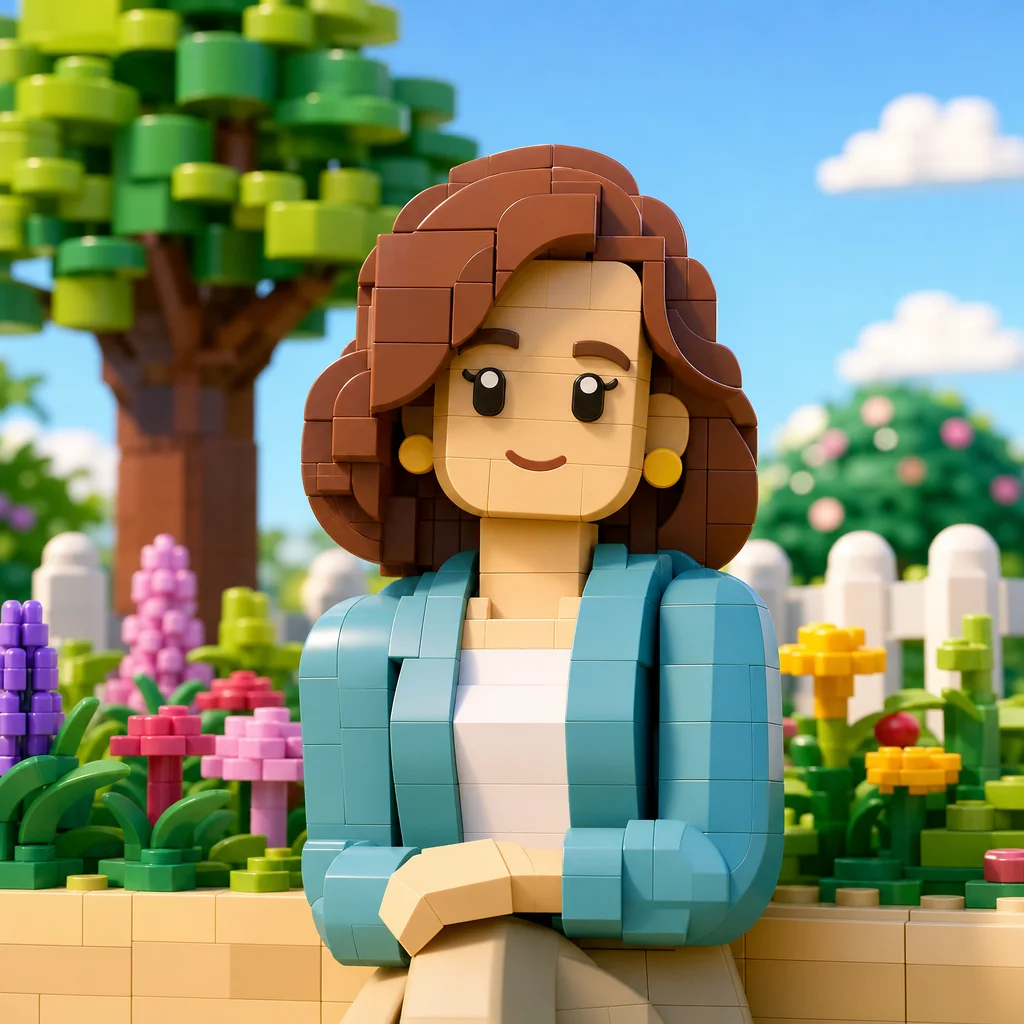
Start with a clear authorized photo with a visible subject and no protected characters, packaging, or third-party marks. Choose brick detail, figure proportion, scene simplification, color direction, and framing, then review the result against the original context before using it.

Create an Photo to Lego Request

Use only material you are authorized to handle. Review source details and intended use before submitting.

JPG, PNG, or WebP, maximum 10 MB. Use only an image you may edit.

.

Key features

Key Features of Photo to Lego

01

Controls matched to the task

The form makes brick detail, figure proportion, scene simplification, color direction, and framing explicit, so the request captures the intended result and delivery context instead of relying on an ambiguous one-line instruction.

02

Source-quality guidance

Begin with a clear authorized photo with a visible subject and no protected characters, packaging, or third-party marks. Clear, authorized source material gives the request a stronger factual and visual foundation for later review.

03

Review points before use

Check source-photo rights, recognizability, unintended logos, age-appropriate design, and whether the result is clearly an unofficial original style concept before relying on a future result. Structured inputs improve clarity but never replace contextual human verification.

04

Responsible-use boundary

Use this tool within a clear boundary: do not reproduce official LEGO branding, minifigures, sets, packaging, or protected characters. Retain source material and permissions whenever they affect sharing or commercial use.
Step by step

How to Use Photo to Lego

  1. 1

    Prepare the source and outcome

    Provide a clear authorized photo with a visible subject and no protected characters, packaging, or third-party marks. Keep the request tied to the actual use case and to information, media, and people you are authorized to handle.

  2. 2

    Set the controls for the destination

    Choose brick detail, figure proportion, scene simplification, color direction, and framing. Select settings that fit the intended audience and placement instead of assuming a more aggressive transformation is always better.

  3. 3

    Review key details before use

    Inspect source-photo rights, recognizability, unintended logos, age-appropriate design, and whether the result is clearly an unofficial original style concept. Compare important details with the source and obtain qualified review when the material affects rights, safety, records, or public claims.

FAQ

FAQ of Photo to Lego

What does Photo to Lego create?+

It prepares an original brick-toy-style interpretation of an authorized photo. Despite the search term, the result should be a generic block-toy concept and not official LEGO merchandise or a branded set.

Can I request official LEGO characters, minifigures, or packaging?+

No. Do not upload or request protected LEGO branding, official figures, packaging, sets, or protected franchise characters. Use generic brick geometry and original color choices instead.

Which photo works best for a brick-toy effect?+

Use a clear image with a visible main subject and simple background. A front-facing portrait or one well-separated object makes it easier to simplify forms into readable block shapes.

Will a brick-toy result keep every small detail?+

No. The effect intentionally simplifies details into larger shapes and color blocks. Review recognizable features, text, logos, and any important context before using a future result.

Can I sell a brick-style image?+

Do not assume commercial rights from the effect alone. You must have rights to the source photo and should avoid third-party marks, protected designs, and any representation that suggests an official brand relationship.